- Home Page
- Blog

Hi, everyone!
One of the main tasks of every affiliate marketer is to collect and create black/white lists, and we understand more than anyone what a tedious and monotonous job this can be. Therefore, we decided to add a new feature that will make creating your lists easier and faster.
Now you don't need to copy the sources into a separate .txt file, mind all the commas and spaces, as the sheet creation function does all the work for you!
Using this function you can easily create lists for all parameters passed in subID1-4.
What are black and white sheets, and why are they needed?
The black list is a list of all sites and feeds that you want to remove from your campaign, for one reason or another. This list’s main objective is to save the money you spend on sites that don’t bring you profit.
The white list is a list of sites and feeds where the advertising ROI is extremely high. This list is created when you want your campaign to be shown only on these, highly profitable sites.
How to choose sources for black/white lists?
To select the sites for your lists, you should set a condition. The condition is a logical or mathematical reasoning utility.
In other words, to select sources for your lists, you have to set a rule, which you will apply to all the sites. Sites that fall under the rule are collected in your black lists.
For example, you want to collect all the sites that are pulling your campaigns down. To calculate what sites you should get rid of you need to know your CPC and the cost of conversion. For example, the conversion is $5, the cost per click is $0.0025. You look and see that source “1” gave you 2800 clicks and zero leads. We increase the number of clicks by the cost per click, 2800 x 0.0025 = 7. This means that you have spent $7 for this site and received zero leads/conversions back. This site ate away your budget and didn’t pay off at all, so it is better to get rid of it and similar sites as well. In order to quickly calculate all badly performing sites, divide the cost of conversion by your CPC, in our case 5 / 0.0025 = 2000. So all the sources that gave 2000 clicks and zero conversions should go to the blacklist.
By the same principle, if we have sources that give a lot of conversions with a few clicks, they can be added to the white list.
Let's take a look at how this happens with an example:
Setting up the Statistics
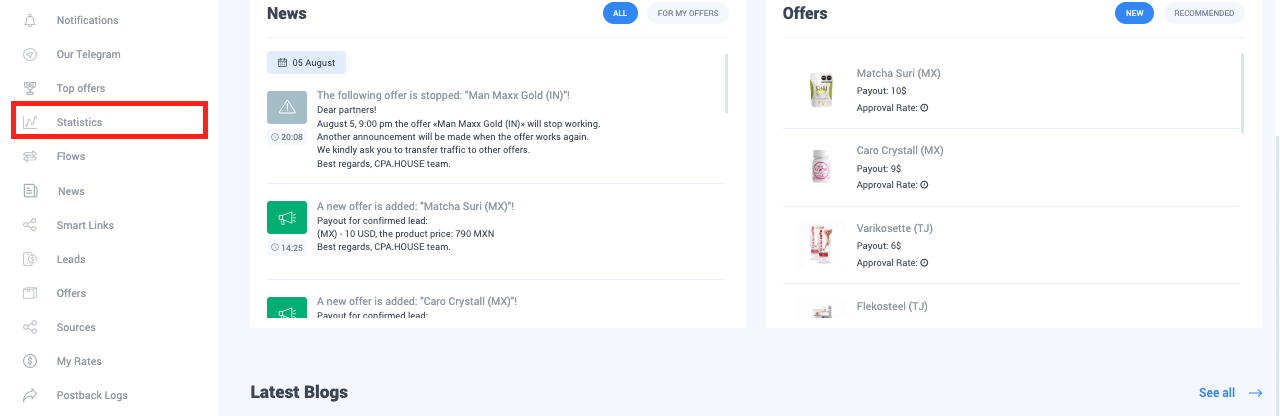
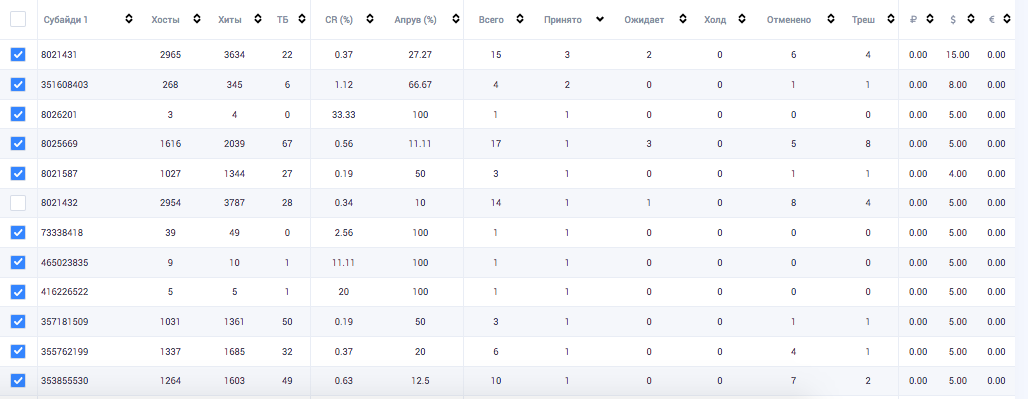
Go to the “Statistics” section in the main menu.
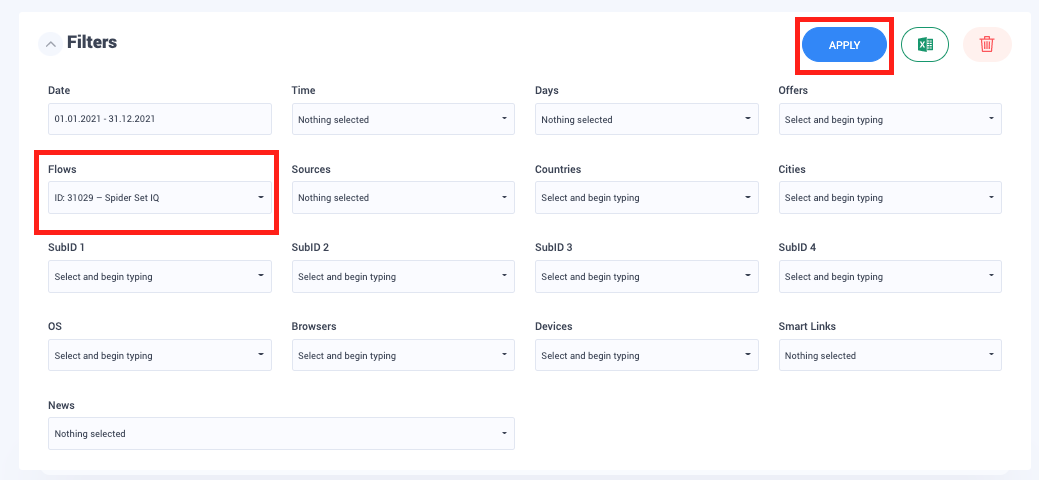
Here we go to the subID, which you used to register the macro of the sites {site} or feeds {feed}. Remember that lists can be created not only for sites or feeds, but also by all parameters transmitted in subs. So, go to the desired section, for example subID1, where by default you should have the site macro {site}.

Click on the drop-down menu “Filter” and set the parameters you need. The main thing is to indicate the flow of the offer for which the lists are created. If the lists for the offer are being made for the first time, it is advised to cover the whole period of the campaign’s run. More detailed analysis by specific periods of time can be made in the future.
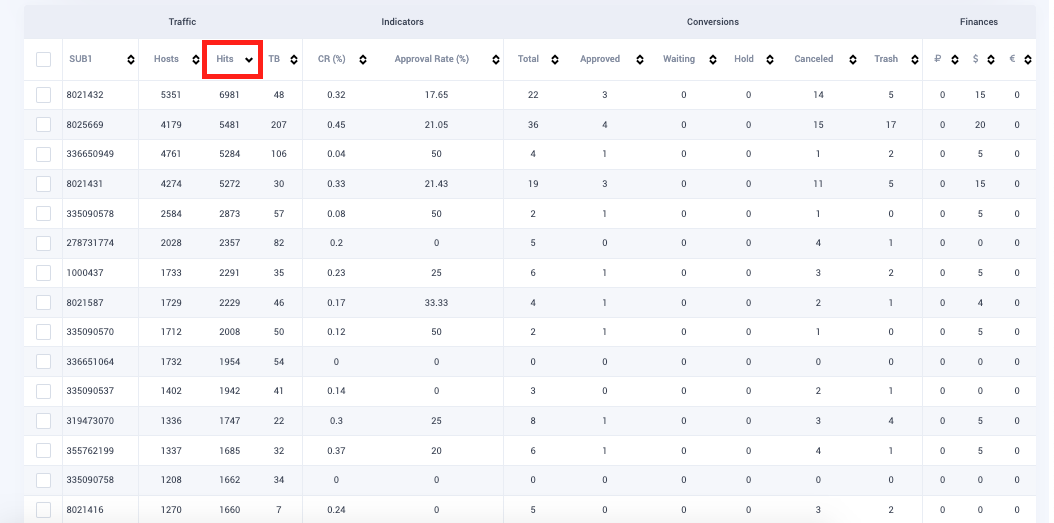
Now you should see all the sites, from which you received traffic. All results can be sorted in ascending or descending order by hosts, hits, leads, and approval rate.
Creating a black list
Let’s make the results display in descending order of hits, this way, sites with most hits, will be the first in our list.
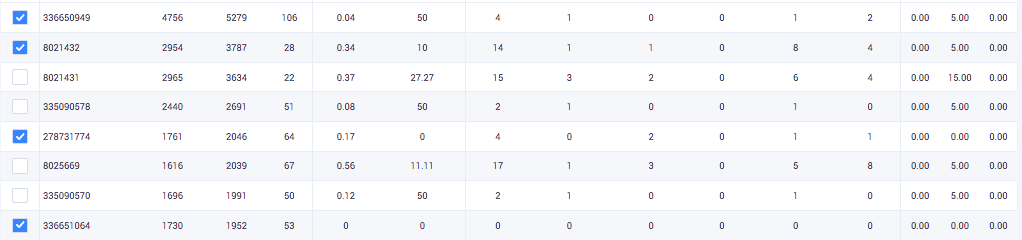
Now all that is required of you is to select a sites that fall behind the rule we have discussed earlier.
Tick off all unnecessary sites in your results.
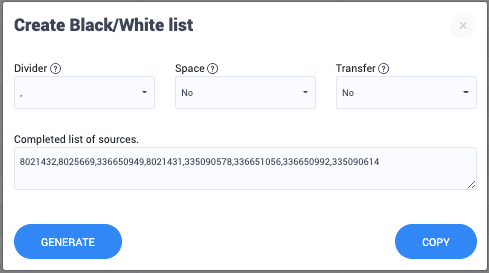
Scroll down the page and click “CREATE BLACK/WHITE LIST”.
In the pop-up window, select the type of your separator (comma, period, etc.), depending on which separator your ad network uses.
Choose whether you want to use a space or not. We are creating a black list for Push.House, so we will not use a space.
Select if you want to use transfer. For Push.House, we will not use transfer.
Click “GENERATE”.
When our list is generated, click “COPY”.
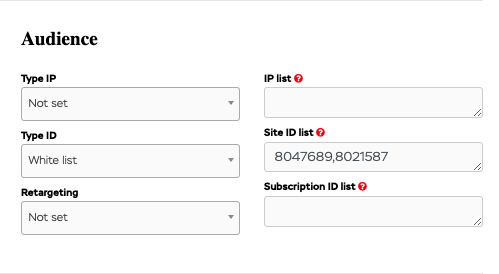
Go to the editing page of your campaign in Push.House, navigate to the “Audience” section. Now insert your list into the “List ID” field and indicate the “black list” in the “ID Type”
Press "Save”, and viola, your campaign will no longer run on these sites.
Creating a white list
To create a white list, it is better to sort the sources in the statistics in descending order of approval rate of leads.
Here, tick off the most profitable sources and create a list from them.
In Push.House, select “white list” in the “ID Type” and copy your sheet into the “ID List” field.
When finished, click “Save”.


Cool support
If you have any questions, you can write to any of our managers

